Create an OCR-Project
How to create and manage an OCR-Project.
- Begin with a collection of all the images in the page section. These are stored in the ebnn/_images folder, in accordance with the folder structure spelled out for the _images Folder.
- In AFR, select , or use the button on the Main toolbar. This creates an empty project.
- Add your image collection to the ocr-project by clicking . In the dialogue box that opens, navigate to your image collection, select all images, and click Open. The images will be added to the project (or appended to the end if you have an existing one open), and their copies will be saved in the ocr-project folder.
-
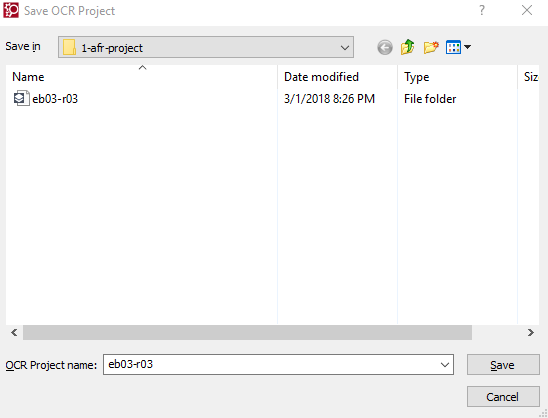
Use to save it to the 1-afr-project folder. Name
the project with edition-section, such as eb03-c01,
eb09-s03, etc. If you are making changes to an existing
project, retain the same name and overwrite the previous version.
-
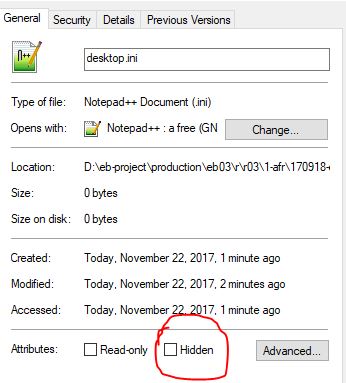
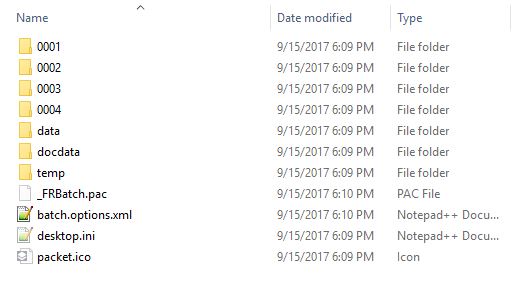
Close AFR and open the project folder in Windows
File Explorer. Change the view options to show all hidden files. Right-click on
FRBatch.pac, desktop.ini, and
packet.ico, select Properties, and
change the file attribute by unchecking hidden.